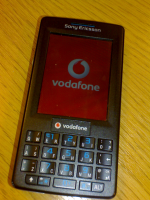
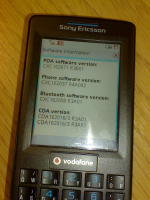
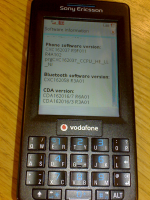
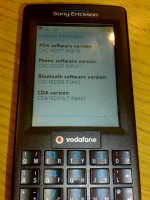
Last year I started using Google Calendar to manage my few events which I had. The only problem was that it was almost impossible to update whilst on the move. However Google XHTML’d the site and shrank it down a bit and allowed you to view it on you’re phone’s browser. But I was still missing the key bit. The entries weren’t appearing in my in-built calendar. I started to look into the Google Calendar API, and found it a nightmare. There were so many different methods depending if the event was all-day, just for an hour or repeating every year, so I gave up. However recently I’ve discovered GooSync, they allow your Google Calendar to talk over SyncML. This means that any events I add to the phone are added to Google and vice-versa. The free service allows 30 days of events to be sync’d with your main calendar. The premium version gives you a full year, plus the ability to sync extra calendars including those “shared” calendars. This means that I now have the full Arsenal fixture list on my phone, which is helpfully updated after each cup draw and ammended why Sky change the kick off time. It should work on almost any phone that was launched in the last two years and I would recommend you trying it, even if it’s the free version.
Category Archives: Mobiles
Orange telling the odd fib
Wandering past the Orange Shop this lunch time I saw this in the window, an advert for the Motorola F3. A pay-as-go phone which costs only £10. But something didn’t seem right, so I took a photo. On the left is the photo, on the right is the offical press photo direct from Motorola.
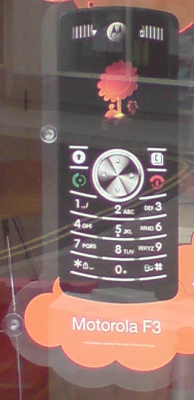
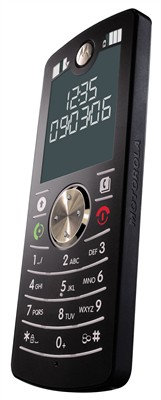
Well the image on the left has a nice orange tree on the screen, yet the one on the right looks like a digital calculator. Maybe the press image is showing the screensaver, but no that is the actuall display. It’s the main reason why the phone is only £10! You can read more about the phone here on GSMArena.
Custom icons on your P990i
![]() Recently it was discovered that you can customise some of the icons on your P990 / M600 or W950 (and I’m guessing the P1 and W960).
Recently it was discovered that you can customise some of the icons on your P990 / M600 or W950 (and I’m guessing the P1 and W960).
The trick involves having files with the same file names in the same location on your memory card as on your Z rom drive. This trick is identical to the one with Fonts.
From the picture on the left, you can see that I’ve changed the bottom status bar icons.
The first steps are to use Swiss Manager Pro or X-plore to copy the original files in the Z:\resource\ folder to your memory card. Then using the USB cable and file transfer mode, or a memory card reader, dump them on your PC.
The files which you can edit are the MBM files. These are multiple bitmaps files which can be opened and created with MBMTool.
In MBMTool open one of the files, then highlight all the numbers in the left and select “Copy image(s) to directory”. In the directory you give, you will now find a collection of BMP files. Using your favourite image editing tool you can change the picture.
Back in MBMTool, delete the old picture and then click on “Add image(s) to list”. Select the file you’ve changed. You will need to ensure with the green arrows at the bottom, that the file is in the same place as the original. Finally highlight the file and press “Change color” and select Color 16bpp.
The next tricky bit is creating a mask file. This will be the black and white file that is similar to the image you’ve just replaced (normally +1 in the file name). Every pixel which is black makes the image transparent, every pixel which is white will show the solid colour of your icon. Any grey colour in between will be a mix of the background and the image. Again as before in MBMTool delete the old mask file, replace with the new mask file and this time “Change color” to Monochrome 8bpp.
Repeat for every icon you want to change and then Save your file (you may need to change the properities of the file to stop it being from Read-Only).
The final step is to copy the file structure onto your memory stick, so you have something like
D:\resource\ZSBLIB\ZSBLIB.mbm
Now reboot your phone and enjoy your icons.
If everything goes wrong, just delete the files from your Memory Stick and everything should return to normal.
I’ve created some packs below in which there is a new signal status bar, duracell battery icon, the arrow on the left has turned into the Sony Ericsson logo, the Task Manager icon on the right is now a nice yellow star, the Wifi icon is a more visable red colour, mute looks like the one from Windows XP and the 3G icon actually makes sense.
For those who want my icons, try these two ZIP files. First has the MBM files, the second the BMPs.
Debrand your P990 / M600 / W950 for FREE
Jan 2008 Update – A new EASIER way to flash your phone for FREE, which also works for the W960 and the P1.
WARNING: Doing this could brick your phone!
Whilst I have successfully converted a Vodafone M600i into an unbranded Australian, there are several reports of it not working and phone being broken. All actions are taken at your own risk!
Following on from my most sucessful blog post ever, we now have a method to debrand your UIQ3 phone for free.
No more Vodafone or Orange customisation!
However this method is slightly more complicated than using KulanKendiClient, so if you’re not too sure for only €6 KulanKendiClient is still worthwhile.
As per anything which involves changing the phones firmware any action you take on your phone is completely your own choice. If you’re not 100% confident then DON’T do it. I would recommend that you read the comments for opinions from other users before starting.
- Perform a back-up of your phone via the PC Suite (or however you prefer)
- Run the Sony Ericsson Update Service (SEUS) and update the firmware of your phone. Even if you have the latest firmware DO THIS! You’ll need to Continue anyway and confirm mulitple times.
- Download the patch file for your phone from here.
For the P990 use P990_CDA162007/1_R9F011_Generic_World_1.rar, for the M600 use M600_CDA-162011/1_R9F011_Generic_World_1.zip and for the W950 try W950_CDA-162014/1_R9F011_Generic_World_1.rar - Unzip / Unrar these files on to your Desktop (or any temp folder)
- Here’s the tricky bit. Open c:\Program Files\Sony Ericsson\Update Service\db\13740270\ and make a backup of the blob_fs folder.
- Now open the blob_fs folder and sort by file size. Right near the bottom you should have a file sized about 353 bytes (if you hover over the 1kb files a tooltip window will give the exact size). Right click this and select Rename, now hold Ctrl and press C (copy).
- On your Desktop find the file you unzipped which is about 353 bytes. Right click and select Rename, now hold Ctrl and press V (paste).
- Repeat for the file which is about 413 bytes.
- Now drag the two files from your Desktop in to the c:\Program Files\Sony Ericsson\Update Service\db\13740270\blob_fs\ folder, and press Yes to overwriting the files.
- Re-flash your phone with SEUS, pressing Yes everytime you are asked “Are you sure?”. This will now rewrite the CDA of your phone.
- Turn your phone on, press next through all the setup screens, then pull the battery out.
- Now for a final time re-flash your phone again with SEUS. This will now download the Generic firmware for your phone and install it.
- Turn your phone back on again and enjoy the debranded menus
Please leave comments below if you get this to work, as I would like to see how well it’s if works. Also if you are having problems please let me know which phone you have and if you leave an email address I can reply to you directly.
TomTom 6.021
Looks like TomTom have released an update to TomTom Navigator 6 for UIQ3 (P990/M600/W950). This update can be found by plugging your phone into your PC whilst TomTom Home is running. Unfortunately it looks like TomTom Home is actually unable to install the update though.
So here’s my step by step guide.
- Plug your phone in to you PC in File Transfer Mode and run TomTom Home.
- Download the update.
- Unplug your phone.
- Uninstall TomTom from your phone.
- Find the cab file which would have been downloaded on to your PC (should be My Documents / TomTom / HOME / Downloads / ttn.symbian.UIQ3.6021.8120.cab)
- Use Unzip software to unpack the cab file.
- Plug phone back in to PC in File Transfer Mode.
- Via MyComputer open the Memory Card.
- Drag-and-drop the 4 folders and install.bif file on to your Memory Card (say yes to any Replace prompts).
- Unplug your phone, wait a short while and follow the prompt to install TomTom.
To be truthful the only difference I can see is the option to switch between Left and Right hand modes, and I’m guessing better memory handling, but not much else.
Debrand your P990i / M600i / W950i
Jan 2008 Update – The new EASY and FREE method is here, which also works on the W960 and the P1.
Jun 2007 Update – Feel like doing it the hardway and for FREE? New step by step guide for the P990 and M600 here!
Got Vodafone, o2 or Orange branding on your Sony Ericsson smartphone? Slightly annoyed that those who have the Generic version have had several firmware updates, whilst your service provider has limited the functions of the phone? Well now you can change the phones version to the generic one via USB on your own PC for only €6.
Now I can’t confirm that it actually works, nor does anything I say mean that I’m liable, however these people on esato and these on my-symbian are extremely happy.
Remember any action you take on your phone is completely your own choice. If you’re not 100% confident then DON’T do it.
Here’s how to do it:
- Perform a back-up of your phone via the PC Suite (or however you prefer)
- Download KulanKendiClient.exe
- Give it a try to ensure that it runs on your computer.
- Purchase a credit for €6 (you only need one)
- Sit back and wait for KK to contact you with your username and password (you may have to wait 24 hours and weekends don’t count, be patient)
- Run the software
- Turn off your phone, hold down the C button (or back button if you can find C), plug the phone into the PC via the USB cable. (Don’t worry if it thinks your M600 or W950 are P990s)
- Tick change CDA and enter CDA162007/1 (P990i) or CDA162011/1 (M600i) or CDA162014/1 (W950i)
- DON’T tick anything else!
- Press Flash Phone
- Wait a short while
- Turn the phone back on. You should now have an extra CDA.
- Wipe your phone via the hidden service menu. Up * Down Down * Down * -> Format internal disk
- Run the Sony Ericsson Update Service, you should now see that you have a Generic World One phone. Hit the Update Phone button and follow the on-screen instructions.
- Wait 10-20 minutes
- Turn the phone back on. Bingo phone is now brandless.
Hope this helps those who are stuck, or have been visiting this blog looking for the answers.
Updates
7th March 2007 – I can now confirm that this works after testing it on a friends phone.
Voicemail tapping – that’s so 1999
 Yesterday we saw Clive Goodman and Glenn Mulcaire go to jail for voicemail tapping. When the story first came out I remembered something that I did 7 years ago. A hall mate Lisa was on BT Cellnet, the same network as me. Taking a guess that she wouldn’t have changed her default pin I called her whilst she was on the phone, got through to the voicemail message, pressed the correct button, entered the default pin and then went around the options. I chose record new message. For two days people calling Lisa and getting through to her voicemail couldn’t workout why they had been diverted through to Dominios Pizza.
Back then it was easy, and it seems that it is still easy for journalists to do the same trick.
A new 4GB Memory Stick Duo Pro for my P990
Having a fancy new phone which has amazing video playback, the ability to run TomTom Navigator 6, store the A-Z of central London and be used as an MP3 player I decided that my 1GB memory card was just too small.
So I went out and purchased a 4GB card. With this I placed all the music from my hard drive (around 20 albums), TomTom, the A-Z, plus around 1.5hours worth of TV shows and found myself to have only used 2GB so far.
So for those of you who have a P990i, a W850i or even a PSP I would recommend this bloke on eBay for some of the cheapest (but original) Memory Stick Duo Pro’s.
P990 for £31
 Yesterday I received an email from Nectar advising me that they have a new partner mobile2points who will swap my old mobile phone for Nectar points.
In the email they wanted to know if I would swap my 4 month old phone for 6200 Nectar points. Wow thousands of nectar points, however 1 point is equal to 0.5p, so I make that £31 for a phone which is £399.99 new direct from Sony Ericsson, or £250 via eBay.
So I really don’t think they will be seeing my phone too soon.
ps. If you do have a phone which is in good nick, want a quick sale and more money than Nectar/mobile2points let me know.
TV on your P990i (Xvid / DivX / MP4 / AVI / MPEG / 3GP)
Following on from my rather successful guides in getting Blackberry and TomTom on your P990i, I’ve decided to write my next guide on getting good videos onto your phone.
UPDATED (Wed 13th Dec 13:54)
Step 1: Download M3
Step 2: If you don’t have it download .NET Framework
Step 3: Run the software with the P990i profile
Step 4: Copy the MP4 file to your memory card.
![M3 [Click to enlarge] M3 [Click to enlarge]](https://blog.artesea.co.uk/images/m3.png)
It’s that easy!!! If you want to do it the hard way follow the instructions below.
The orignal post
After spending days sifting through all those Google links, trying to avoid software which sliced the files, was expensive or contained spyware / viral software I was finally pointed towards SUPER © (keep looking for the download links).
It’s free and as far as I can see has no spyware or anything else nasty (please let me know if you do spot something).
Installing is simple and when you finally get it running you should see this screen with tons of settings.
![P990 Super Settings [Click to enlarge] P990 Super Settings [Click to enlarge]](https://blog.artesea.co.uk/images/p990_super_settings.png)
![Battlestar Specs [Click to enlarge] Battlestar Specs [Click to enlarge]](https://blog.artesea.co.uk/images/battlestar_specs.png)
You should either find the file you want converting and drag-and-drop it, or right-click and selected Add Multimedia File(s).
Now you can do what you want, but as your reading this, I’m guessing you want my opinion. So:
Output Container – mp4 (MPEG-4);
Video Codec – MPEG-4;
Audio Codec – AAC;
Use Direct Show – Ticked;
Video Scale Size – 320×240;
Aspect – 4:3;
The next one seems to be debated a lot, the phone will cope with 30 frames per second, however I always recommend using the same as the source file. There is no point setting it to 30 when the original was only 23.98. As each file is different always check this one. To investigate double click on the files name in the big grey box towards the bottom. This should open a window like that on the right and look for the line with FrameRate/String, for this file it’s 23.976 so I’ve used 23.98 in SUPER ©.
Bitrate kbps – 768;
Hi Quality – Ticked;
Stretch It – Un-ticked;
Audio Sampling Freq – 24000 (if you can really tell the difference then set it to 48000, but I don’t think it’s worth it);
Channels – 2;
Bitrate kbps – 64;
Now all your settings are complete, you just need to hit the Encode button and wait.
Two things to point out, firstly the status bar is pointless, it gets to what looks like 100% pretty quickly, before returning to zero. It will do this lots. Secondly for large files (+300mb) it seems to always say that the conversion failed. With these settings your files should be reduced by around a third, so if it’s only 50-100mb you may need to try again. If it’s 200mb it’s most likely worked.
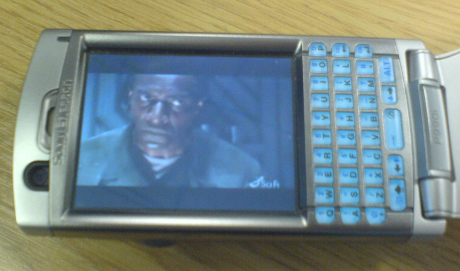
The last step is copying the file to your phone or memory stick which is easy, then opening Media Player, Video and selecting the file. (Warning, don’t worry that it can take up to 30 seconds for the file to start and that you’ll phone will just jam, it will play eventually!)
Finally two small short cuts:
Right-click on SUPER © and you should see an option called Specify The Output Folder Destination, it’s worth setting this to something within My Documents, otherwise you’ll spend ages hunting for your converted file.
Also if you right-click another option is called Import (Load) An External SUPER © Profile and in the file name box enter https://blog.artesea.co.uk/images/P990i.spf and all the settings will be set to those above.
