11 hours and 607 pages later

Harry Potter This morning at 6.30 I headed down to Asda, knowing that if I went via Amazon the postman would only be arriving by now and also for only a fiver I was getting a much better deal.
Now if by this point you don’t realise that I’m talking about Harry Potter and the Deathly Hallows, where have you been.
As this was the last book I was sure the spoilers would appear as soon as possible, so I put myself into a media blackout. The mobile was left upstairs, the TV was unplugged and the local newspaper was still in the door. Even the trip to the supermarket involved a silent car journey and fingers in my ears.
So why all the fuss? I only started reading Potter in 2001 after book 4 came out. Bored one day at uni I stole a copy of book one, the following day book two and by the fifth day all four were finished.
The books aren’t bad, a bit repetitive but I was hooked. So every time a new book came out I got it straight away. However this time I went for no stop reading.
The final book is a good read, it only drags a bit near the middle. Tales of good vs evil, right vs wrong and of course the predictable plot lines.
Now I could spoil it for you by saying how it end, so here it goes

well.

if you can still get a copy for a fiver it’s worth it. £8.99 at a push but not the £17.99 it says inside the cover. And whilst were there Bloomsbury were saying that it’s worth it, yet book 6 has the same number of pages and is a quid cheaper and 5 had almost 200 more pages! With sales in the millions surely some economies of sale could be reached in reducing the costs?
7 out of 10

Custom icons on your P990i

P990 New IconsRecently it was discovered that you can customise some of the icons on your P990 / M600 or W950 (and I’m guessing the P1 and W960).

The trick involves having files with the same file names in the same location on your memory card as on your Z rom drive. This trick is identical to the one with Fonts.
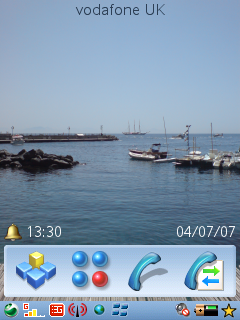
From the picture on the left, you can see that I’ve changed the bottom status bar icons.

The first steps are to use Swiss Manager Pro or X-plore to copy the original files in the Z:\resource\ folder to your memory card. Then using the USB cable and file transfer mode, or a memory card reader, dump them on your PC.
The files which you can edit are the MBM files. These are multiple bitmaps files which can be opened and created with MBMTool.
In MBMTool open one of the files, then highlight all the numbers in the left and select “Copy image(s) to directory”. In the directory you give, you will now find a collection of BMP files. Using your favourite image editing tool you can change the picture.
Back in MBMTool, delete the old picture and then click on “Add image(s) to list”. Select the file you’ve changed. You will need to ensure with the green arrows at the bottom, that the file is in the same place as the original. Finally highlight the file and press “Change color” and select Color 16bpp.
The next tricky bit is creating a mask file. This will be the black and white file that is similar to the image you’ve just replaced (normally +1 in the file name). Every pixel which is black makes the image transparent, every pixel which is white will show the solid colour of your icon. Any grey colour in between will be a mix of the background and the image. Again as before in MBMTool delete the old mask file, replace with the new mask file and this time “Change color” to Monochrome 8bpp.
Repeat for every icon you want to change and then Save your file (you may need to change the properities of the file to stop it being from Read-Only).

The final step is to copy the file structure onto your memory stick, so you have something like
D:\resource\ZSBLIB\ZSBLIB.mbm

Now reboot your phone and enjoy your icons.

If everything goes wrong, just delete the files from your Memory Stick and everything should return to normal.

I’ve created some packs below in which there is a new signal status bar, duracell battery icon, the arrow on the left has turned into the Sony Ericsson logo, the Task Manager icon on the right is now a nice yellow star, the Wifi icon is a more visable red colour, mute looks like the one from Windows XP and the 3G icon actually makes sense.

For those who want my icons, try these two ZIP files. First has the MBM files, the second the BMPs.


Debrand your P990 / M600 / W950 for FREE

Jan 2008 UpdateA new EASIER way to flash your phone for FREE, which also works for the W960 and the P1.

WARNING: Doing this could brick your phone!
Whilst I have successfully converted a Vodafone M600i into an unbranded Australian, there are several reports of it not working and phone being broken. All actions are taken at your own risk!

Following on from my most sucessful blog post ever, we now have a method to debrand your UIQ3 phone for free.
No more Vodafone or Orange customisation!

However this method is slightly more complicated than using KulanKendiClient, so if you’re not too sure for only €6 KulanKendiClient is still worthwhile.

As per anything which involves changing the phones firmware any action you take on your phone is completely your own choice. If you’re not 100% confident then DON’T do it. I would recommend that you read the comments for opinions from other users before starting.

  1. Perform a back-up of your phone via the PC Suite (or however you prefer)
  2. Run the Sony Ericsson Update Service (SEUS) and update the firmware of your phone. Even if you have the latest firmware DO THIS! You’ll need to Continue anyway and confirm mulitple times.
  3. Download the patch file for your phone from here.
    For the P990 use P990_CDA162007/1_R9F011_Generic_World_1.rar, for the M600 use M600_CDA-162011/1_R9F011_Generic_World_1.zip and for the W950 try W950_CDA-162014/1_R9F011_Generic_World_1.rar
  4. Unzip / Unrar these files on to your Desktop (or any temp folder)
  5. Here’s the tricky bit. Open c:\Program Files\Sony Ericsson\Update Service\db\13740270\ and make a backup of the blob_fs folder.
  6. Now open the blob_fs folder and sort by file size. Right near the bottom you should have a file sized about 353 bytes (if you hover over the 1kb files a tooltip window will give the exact size). Right click this and select Rename, now hold Ctrl and press C (copy).
  7. On your Desktop find the file you unzipped which is about 353 bytes. Right click and select Rename, now hold Ctrl and press V (paste).
  8. Repeat for the file which is about 413 bytes.
  9. Now drag the two files from your Desktop in to the c:\Program Files\Sony Ericsson\Update Service\db\13740270\blob_fs\ folder, and press Yes to overwriting the files.
  10. Re-flash your phone with SEUS, pressing Yes everytime you are asked “Are you sure?”. This will now rewrite the CDA of your phone.
  11. Turn your phone on, press next through all the setup screens, then pull the battery out.
  12. Now for a final time re-flash your phone again with SEUS. This will now download the Generic firmware for your phone and install it.
  13. Turn your phone back on again and enjoy the debranded menus

Pictures:
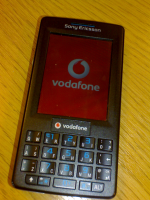
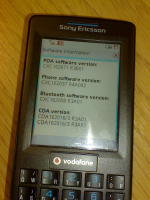
Before
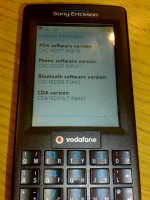
M600 Vodafone Startup M600 Vodafone CDA
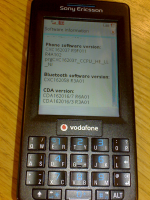
During
M600 Vodafone Startup M600 Mixed CDA
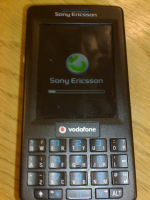
After
M600 Sony Ericsson Startup M600 Generic CDA

Please leave comments below if you get this to work, as I would like to see how well it’s if works. Also if you are having problems please let me know which phone you have and if you leave an email address I can reply to you directly.

Live stats

I’ve recently upgraded the MyBlogLog stats for LibDemBlogs. This now means that you see today’s most popular stories and not yesterdays on the site, and that I can see which posts were most popular over a period of time, making it a bit easier for Stephen Tall to do the weekly round-up each Sunday on LibDemVoice.

Whilst on MyBlogLog I noticed the option to add your Twitter status, after Facebook this morning it looks like Web 2.0 is getting smaller.